Apple I Replica Creation -- Chapter 2: Tools and Materials
| Chapter 2 |
| Tools and Materials |
Introduction
Before we get started building an Apple I replica, let's take a look at a few of the tools and materials we'll need to complete the project. Some are more necessary than others and several won't be needed until later in the book. If you don't have the parts you need to build an Apple I readily available or have trouble obtaining them, you might consider skipping ahead to the programming section for the time being and simply using an emulator instead.
Essential Tools and Supplies
Multimeter
A digital multimeter is the first item on our list and a tool everyone should own. We're about to spend a few hundred pages talking about electricity, so it's important to be familiar with the tool we use to measure it. We'll be using it primarily to measure DC voltage and occasionally resistance. If you don't have a multimeter, consider buying one at once. It doesn't need to be anything fancy to be functional for use in these projects. An inexpensive meter from Harbor Freight or eBay can be had for under $10 and will work just fine.
Figure 2.1 shows the meter I normally use. I almost ordered it from Jameco, but I saw Harbor Freight had the same unit on sale at half the price. Be sure to shop around to find the best deal. This meter is made by Cen-Tech, which seems to dominate the cheap multimeter market.
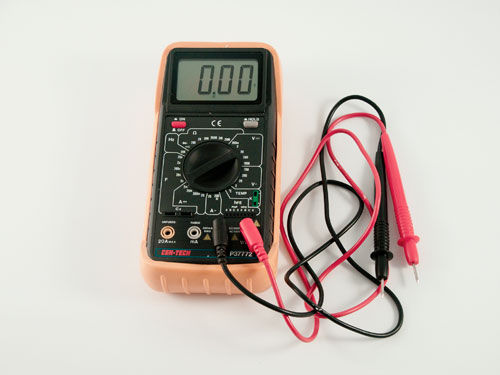
Figure 2.1 Cen-Tech 37772 Multimeter
Shown in Figure 2.2 is one of the less-expensive meters you'll find on eBay or at an import store. It's also made by Cen-Tech, and works moderately well, but is of a significantly lesser quality than its pricier counterparts. I've already broken one of the cables, and when the batteries died in this unit, I lost patience and wired it up to AC using a power adapter from an old modem. A less expensive model can be good to have around as a practical backup unit.
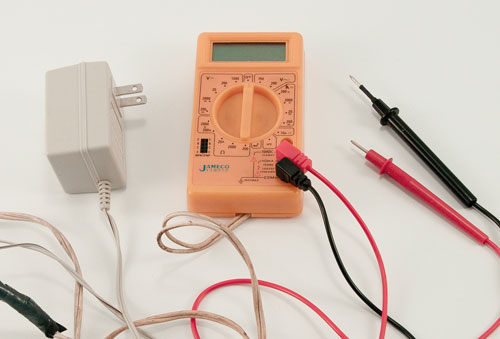
Figure 2.2 Cen-Tech 92020 Seven-Function Multimeter
Finally, if you're feeling especially geeky, large, older meters like a Racal-Dana can be fun (Figure 2.3). They're more precise and more reliable than their cheap, modern counterparts, and you can pick one up for a song from surplus sellers. Of course, they are kind of big... (This particular unit was Navy surplus and came out of a system for testing aircraft circuitry. It's about 20 years old.)
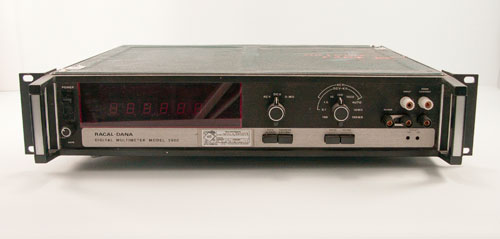
Figure 2.3 Racal-Dana Multimeter
| Product Type | Retailer | Item No. | Price |
| Cen-Tech Multimeter | Harbor Freight | 37772-3VGA | $19.99 |
| Cen-Tech 7-Func Multimeter | Harbor Freight | 92020-0VGA | $9.99 |
| EZ Digital Benchtop Multimeter | Jameco | 132564 | $219.95 |
Logic Probe
Digital signals are either off or on, low or high, zero or one. Touch the point of a logic probe to a wire and it will respond with either a "high" or a "low." This is an invaluable tool for building circuits and one you'll use frequently. Most logic probes have two light emitting diodes (LEDs), one of which lights up when the line is high, and the other when it's low. Since they're shaped and held like pens, depending on how a logic probe is designed, the LEDs can be hard to see while you're working. Look for a probe that has its LEDs close to the tip, or try to find one that also uses audio tones as an indicator. In addition, try to find one that looks like it could double as a murder weapon because if the point isn't sharp (thin) enough, you could find it difficult to get into breadboard holes (next section).
In Figure 2.4 you can see my logic probe, which is a bit awkward to work with because of the positioning of the LEDs. Figure 2.5 shows a classic Hewllet-Packard logic probe. These are no longer available new, but can still be found on eBay, and are often a better value than the majority of the newer probes.
A logic probe can be purchased for under $20. If you'd rather not spend the money, it's possible to get by with just a multimeter. In this case, 2.4 to 5 volts is a digital high, and 0 to 0.4 volts, a digital low.

Figure 2.4 LP-900 Logic Probe

Figure 2.5 HP Logic Probe
| Product Type | Retailer | Item No. | Price |
| LP-525K Logic Probe Kit | Ocean State Electronics | LP-525K | $15.95 |
| LP-550 Logic Probe | Ocean State Electronics | LP-550 | $18.95 |
| LP-900 Logic Probe | Ocean State Electronics | LP-900 | $27.95 |
| Logic Probe | Jameco | 149930 | $29.95 |
Breadboard
Before building the replica, we're going to do a few basic experiments in electronics. A breadboard is almost essential for these exercises and is also ideal for making quick prototypes. Breadboards come in a variety of sizes. In Figure 2.6, you'll see three models that Circuit Specialists sells. The medium unit on the left is what I recommend. It's large enough to handle all the projects in this book and has multi-way binding posts for connecting to a power supply. The smaller unit on the right will work just as well, but it's not as convenient.
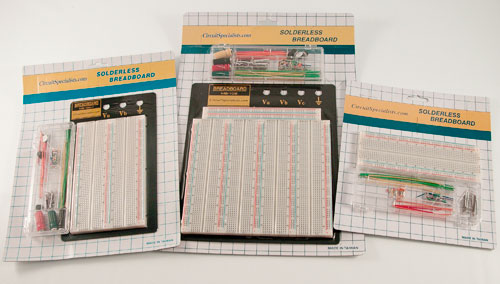
Figure 2.6 Breadboards
| Size | Retailer | Item No. | Price |
| Small | Circuit Specialists | WB-102+J | $6.25 |
| Medium | Circuit Specialists | WB-104-1+J | $12.99 |
| Large | Circuit Specialists | WB-108+J | $22.90 |
Wire-Wrap Tools
Wire-wrapping is a useful technique to use if you have unique designs that you want to build, play with for a few months, and then take apart. Breadboards are much more convenient for quick, temporary designs, whereas circuit boards are more reliable for long-term setups (especially if your wire-wrapping abilities are anything like mine). If, however, you're designing your circuit as you're building it, or you just don't have the patience to wait around for a printed circuit board, wire-wrap may be your best option.
A basic wrapping tool from Radio Shack (Table 2.4) works considerably well. Be sure to get a few different colors of wire so you can tell them apart. There is nothing worse than trying to trace a tangled mess of thousands of wire-wrapped lines—this cheapskate knows!
If you expect to do a lot of wire-wrapping, consider getting a Cooper automatic wire-wrapping tool. These sell as new for a few hundred dollars, but can often be found at very affordable prices on eBay.
Finally, you're going to need sockets to hold the chips, as well as a wire-wrap board. Sockets cost anywhere from $0.80 to a little over $3.00, which means that they can add up quickly. For circuit boards, try the 32-DE-STD wire-wrap board from Douglas Electronics, which is available for $21.53. Douglas is a reliable company. I have one of its brochures from 1983 in which the same board is advertised with the same part number - and the price has only gone up $1.53 in the last 29 years.
| Product Type | Retailer | Item No. | Price |
| Wire-Wrapping Tool | Radio Shack | 276-1570 | $6.99 |
| Red Wire-Wrap | Radio Shack | 278-501 | $3.29 |
| White Wire-Wrap | Radio Shack | 278-502 | $3.29 |
| Blue Wire-Wrap | Radio Shack | 278-503 | $3.29 |
| 8-pin DIP Socket | Radio Shack | 900-7242 | $0.80 |
| 14-pin DIP Socket | Radio Shack | 900-7243 | $1.20 |
| 16-pin DIP Socket | Radio Shack | 900-7244 | $1.35 |
| 18-pin DIP Socket | Radio Shack | 900-7245 | $1.56 |
| 20-pin DIP Socket | Radio Shack | 900-7246 | $1.75 |
| 24-pin DIP Socket | Radio Shack | 900-7249 | $2.00 |
| 28-pin DIP Socket | Radio Shack | 900-7250 | $2.42 |
| 40-pin DIP Socket | Jameco | 41187 | $3.15 |
Soldering Iron & Materials
Soldering components to a circuit board is the most reliable and permanent method for building your Apple I replica. While printed circuit boards can be potentially expensive (see Circuit Boards and Software Tools later in this chapter), the soldering equipment itself can be very affordable. A good soldering job on a printed circuit board will result in a product indistinguishable from a professionally-made board.
When choosing a soldering iron, make sure to get one with adequate power. An inexpensive 15-watt iron (Figure 2.7), which can be found for around $5, can be adequate, but is exceedingly frustrating to use if you don't know what you're doing. A 40-watt iron can be purchased for under $10 and will save you a world of frustration. These "pencil irons" are contained entirely within the handle. In Figure 2.8 you can see the simple coil-heating mechanism of a standard pencil iron.
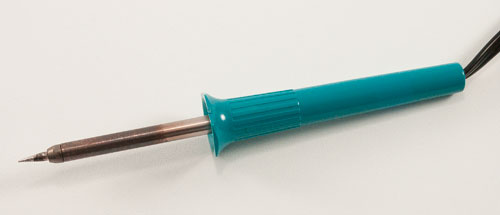
Figure 2.7 15-Watt Soldering Iron
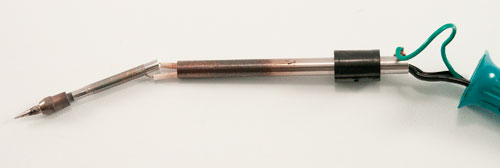
Figure 2.8 Disassembled Soldering Iron
If you plan to do a lot of soldering, consider a more expensive, temperature-controlled iron. Temperature-controlled irons allow you to precisely set the temperature of your iron and ensure that it stays within a narrow range. Shown in Figure 2.9 is a Hakko FP-102 soldering station. It, like similar high-end soldering irons, is very reliable and pleasant to work with.

Figure 2.9 Hakko FP-102 Soldering Station
Soldering Safety Don't neglect safety. Molten solder to the eyeball is sure to ruin your day; so, always wear safety goggles. Likewise, be sure to work in a well-ventilated room and keep a fan on to blow the fumes away from you. And if the iron starts to fall—don't try to catch it! |
Solder is inexpensive and can be found at any electronics store. However, be certain that you purchase rosin-core and not acid-core solder. Even though it's doubtful you'd find it in an electronic store, acid-core solder will ruin your circuits.
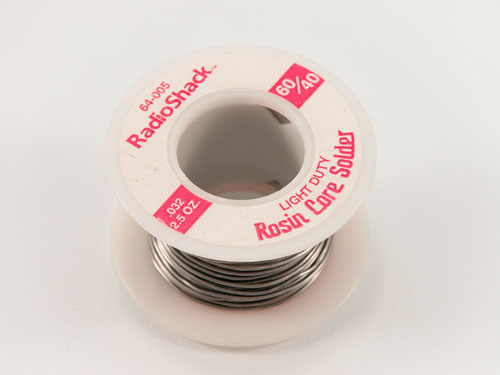
Figure 2.10 Solder
Mistakes are made, and components die. Sometimes it's necessary to remove a component that has been soldered down. There are two different methods for doing so. One is to heat the solder and suck it into a desoldering pump (Figure 2.11). The other method is to wick the solder out with a desoldering braid (Figure 2.12). The braid is placed against the solder and then heated. As the solder melts, it diffuses into the braid.
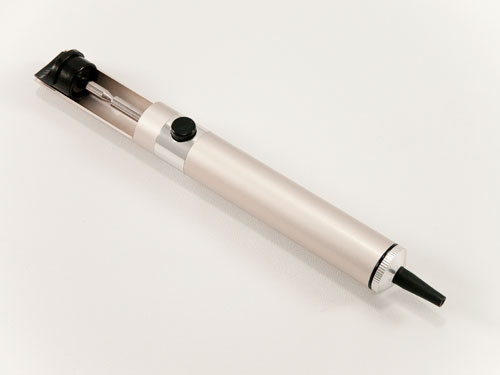
Figure 2.11 Desoldering Pump
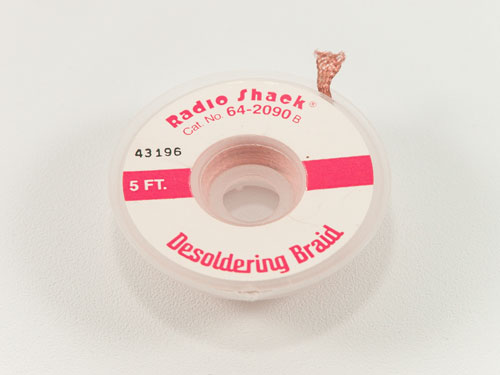
Figure 2.12 Desoldering Braid
| Product Type | Retailer | Item No. | Price |
| Hakko FX-951 | Hakko USA | FX-951 | $224.99 |
| 40-Watt Pencil Iron | Radio Shack | #64-2071 | $8.39 |
| 15-Watt with Grounded Tip | Radio Shack | #64-2051 | $8.39 |
| Xytronix Soldering Iron, 40W | Jameco | #224602 | $9.95 |
| Rosin Core Solder—8.0 Oz. | Radio Shack | #64-007 | $7.29 |
| Solder Roll—1.1 Lbs. | Jameco | #141786 | $7.95 |
| Desoldering Tool | Radio Shack | #64-2098 | $7.29 |
| Desoldering Pump | Jameco | #19166 | $4.95 |
| Desoldering Braid | Radio Shack | #64-2090 | $3.19 |
| Desoldering Braid | Jameco | #63695 | $1.95 |
Power Supply
To power your Apple I replica, as well as your other experiments, you're going to need an AT-style computer power supply. An AT power supply is distinguished by the connectors shown in Figure 2.13.

Figure 2.13 AT Motherboard Connectors
An AT power supply (Figure 2.14) should be fairly easy to find. Any pre-ATX computer will have one, and systems like those get thrown out every day. Go to a Hamfest (www.arrl.org/hamfests.html) and you'll find one for no more than a couple dollars. On eBay you can purchase one for around $5, and new ones can run anywhere from $35 to $50. When looking at power supplies, you'll usually see the wattage rating advertised. For our simple project, any rating will work. If you already have a spare ATX power supply, you only need to find an adapter similar to the one pictured in Figure 2.15.
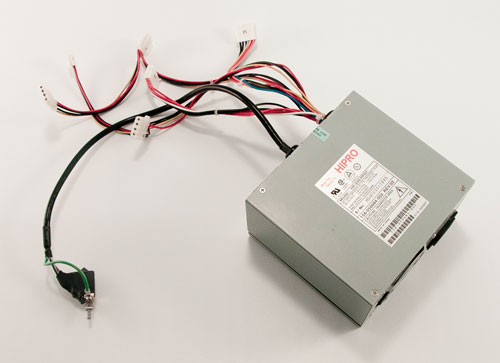
Figure 2.14 AT Power Supply
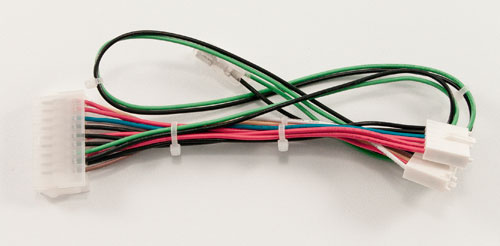
Figure 2.15 ATX-to-AT Adapter
AT supplies are "switching" units and generally require a load to operate properly. With nothing connected to it, check the output voltage on the 5-volt (red) line of your power supply. It should be 5 volts. If it's not, try connecting it to something like a spare hard drive in order to create a load and regulate the voltage. With the AT power supplies I've used, this hasn't been necessary, but it's a good idea to check before you connect anything important.
TTL Chips
We'll be doing many experiments in the next few chapters, so it's good to have chips readily available. The chips you'll need to complete the introductory projects are listed in Table 2.6.
| IC | Type | Jameco Part No. | Price |
| 74LS00 | NAND | 46252 | $0.29 |
| 74LS02 | NOR | 46287 | $0.29 |
| 74LS04 | INV | 46316 | $0.29 |
| 74LS08 | AND | 46375 | $0.36 |
| 74LS32 | OR | 47466 | $0.29 |
| 74LS74 | Flip-Flop | 48004 | $0.29 |
| 74LS86 | XOR | 48098 | $0.35 |
TTL chips will be labeled with 74xx, where "74" is the series of chips we'll be using and "xx" is a number which specifies each particular chip. Often you'll see a few letters in between the "74" and "xx," such as 74LSxx. These classifications are described as follows:
- 74Lxx, low-power. Requires 1/10 the power and runs at 1/10 the speed of a standard TTL IC.
- 74Hxx, high-power. Requires twice the power and operates at twice the speed.
- 74Sxx, Schottky. Runs at higher speed.
- 74LSxx, Low-power Schottky. Runs at high speed and requires 1/5 the power.
- 74ALSxx. Advanced Low-power Schottky.
- 74HCxx. CMOS chips; equivalent to the CMOS 4xxx series.
TTL Background Transistor-Transistor Logic (TTL) is a method for creating the logic gates in integrated circuits by using two transistors at the output circuit. The primary alternative to TTL is Complementary Metal Oxide Semiconductor (CMOS). CMOS circuits use less power than TTL but are also more prone to static damage. You can get most of the TTL chips for under a dollar from Jameco. You can also buy bags of mixed chips very affordably from Jameco and on eBay. If you're planning to do more projects, these are a good deal. Another option is to take the chips out of old computers and other electronics that are being discarded. Don't let any piece of hardware make it to the trash without being thoroughly dismantled. Circuit boards are always a great place to find chips, while printers and disk drives are a great source for small motors. |
Circuit Boards and Software Tools
Printed circuit boards (PCBs) usually offer the greatest reliability, but producing them is an involved process. If you want your Apple I replica to use a printed circuit board, your most economical choice is to use a Replica I board from Briel Computers (www.brielcomputers.com). Purchasing one of these boards is much faster and cheaper than designing and building your own, or having a PCB manufacturer make you a prototype.
If you decide you want to modify the designs presented here, you can find all the necessary files in the Supplemental Software package. The files can be edited, and the boards designed, with the included McCAD Schematics and PCB software. Documentation and a training video for the software is also available in the package or can be found at www.mccad.com.
McCAD PCB will produce industry-standard files which you can than send to a manufacturer for printing. Expect to pay about $100 for the service of having your board printed. A selection of PCB manufacturers is listed in Table 2.7.
| PCB Express | www.pcbontime.com |
| Overnite Protos | www.pcborder.com |
| ExpressPCB | www.expresspcb.com |
| PCBExpress | www.pcbexpress.com |
Chip Pullers and Straighteners
As you work, you'll frequently find yourself in a situation where you want to remove chips from their sockets. The best way to do this is to take a small flat-blade screwdriver, insert it under the chip, and gently pry upwards. If the chip is soldered onto the board, you can use an IC extraction tool (about $2) to gently pull it up as you desolder. However, you should not use it to remove socketed chips as it will put pressure on solder joints.
One tool that's very helpful to have is a chip straightener. Invariably, the pins on the chip you're attempting to insert will be bent out just a little bit further than what you need. Bending them back into position can be an onerous task without a straightener.
| Product Type | Retailer | Item No. | Price |
| IC Pin Straightener | Jameco | #99362 | $6.95 |
| DIP IC Extractor | Jameco | #16838 | $1.49 |
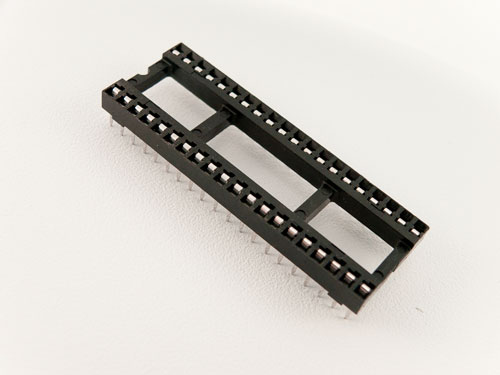
Chip Sockets Sockets (Figure 2.16) allow you to easily insert and remove chips without soldering them directly to the circuit board. Instead of the chip, the socket gets soldered to the board. This facilitates the replacement of chips and also spares them from the extreme heat of being soldered in directly.
|
Keyboard and Monitor
Whether you end up building a replica Apple I from a kit or using your own design, you're going to want a keyboard and monitor. The original Apple I used an ASCII keyboard, and this option remains today. Unfortunately, ASCII keyboards are all but impossible to find. Figure 2.17 shows an ASCII keyboard taken from an Apple II Plus, but these machines are becoming collectibles in their own right. As an alternative, Vince Briel designed an interface for a PS/2 keyboard, which is now part of his Replica I design. With this, any modern PS/2 keyboard, such as that in Figure 2.18, can be used with the Replica I.

Figure 2.17 ASCII Keyboard
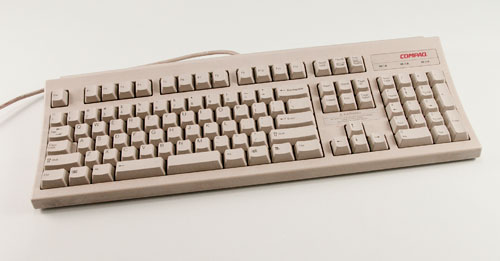
Figure 2.18 PS/2 Keyboard
Video is output as a standard composite signal. If you have an old composite monitor (Figure 2.19) such as from an Apple IIe or Commodore 64, it will work perfectly. Otherwise, composite monitors can also be found on eBay for a pittance, or a television with composite video input will work just as well.
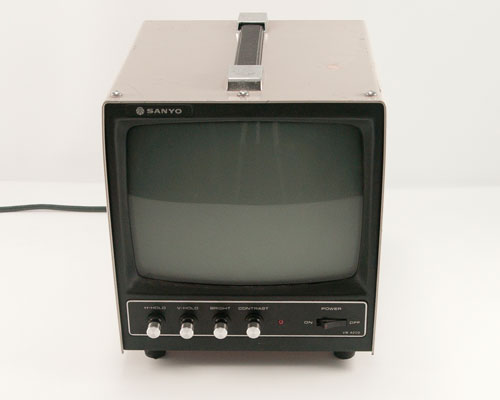
Figure 2.19 Video Monitor
Ambiance
What are you neighbors doing right now? Probably something ordinary. By contrast, you're designing a computer in your garage, bedroom, or basement. Wherever you are, it's important that you begin referring to this location as your "laboratory." Pronunciation is equally important. Lower your voice and deeply enunciate each syllable. Practice explaining to your parents or spouse that you are "vorking in your laboratory." Because, let's face it, ordinary folks don't build computers.
Now that you've got a laboratory (did you pronounce that correctly?), a lab coat is clearly in order. There are a plethora of new lab coats on eBay, often factory seconds, that sell for under $10. A lot of lab coats now come in blue, but I strongly recommend white for that quintessential mad scientist look. Order a spare—you never know when you might have company.
Let's not forget safety glasses! Sure, we mentioned them earlier in regards to soldering, but safety glasses can be quite stylish too. For the best reactions from others, be sure to get colored lenses. Mine are tinted green.
Finally, we need music—something ominous to set the mood. I asked my fellow mad scientists what they listen to and came up with a few suggestions. Dr. Webster recommends Carl Orff's classical Camina Burana. Reverend Darkness is a fan of Night on Bald Mountain as well as Tocatta and Fugue in D minor, played by an orchestra (not by the usual pipe organ). Dead_elvis listens to Danse Macabre by Saint-Saëns and Mozart's Reqium Mass. Also worthy of consideration are the soundracks to The Twilight Zone and 2001:A Space Odyssey. Stuka recommends the MIDI soundtrack from the game Doom, which is available for free online.
| ← Previous | Contents | Next → |